EME221 Series Preamplifier Kits
- EME221-70CM Description:
Updated! June 2022 - EME221-23CM Description:
- EME221-70CM
Application Block
- EME221-23CM
Application Block
- Kit Constructors Alert:
Updated! 26/3/19 - EME221-70CM Kit Notes:
Updated! 12/10/16 - EME221-23CM Kit Notes:
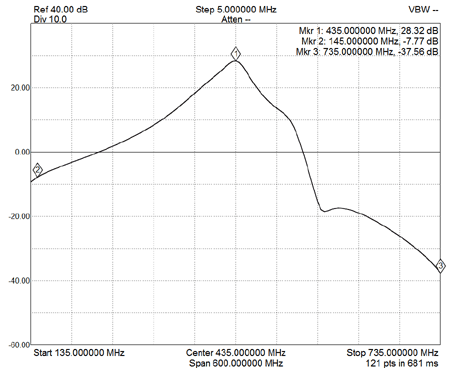
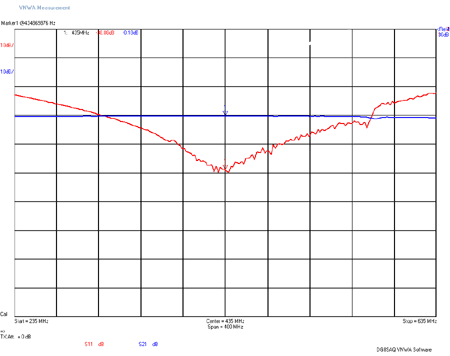
Updated! 11/7/20 - EME221-70CM Kit Performance Tests:
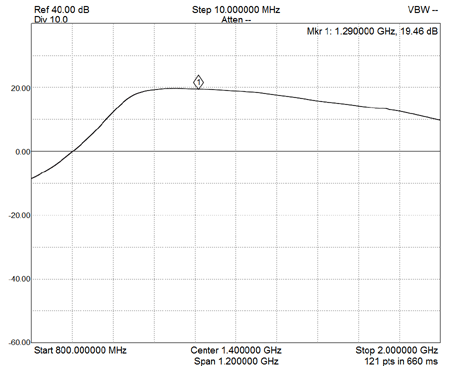
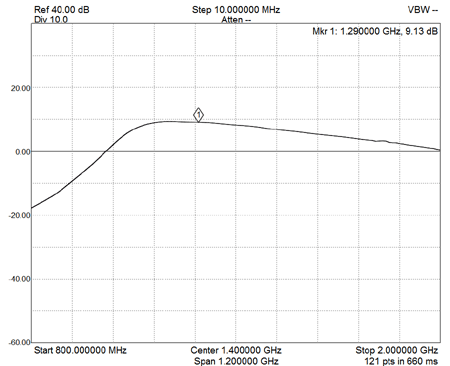
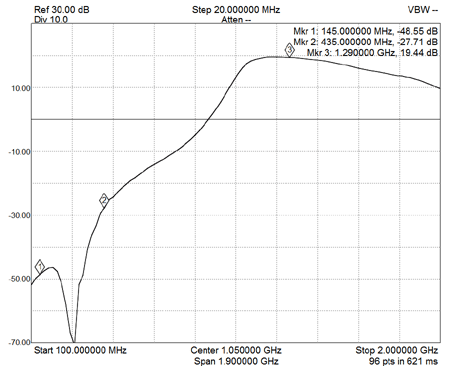
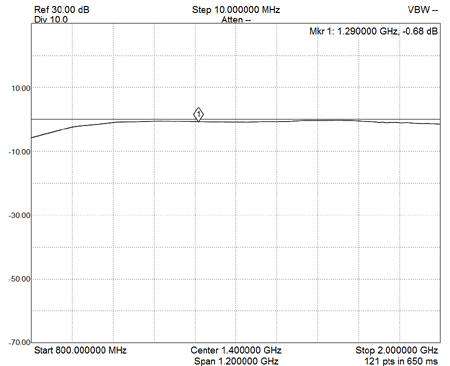
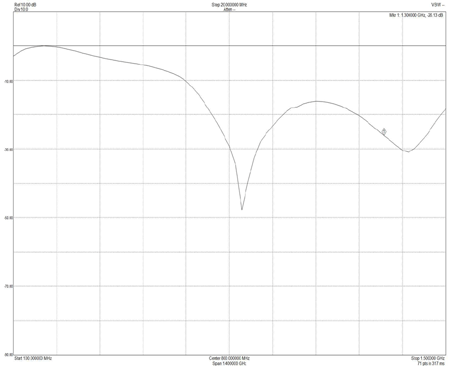
- EME221-23CM Kit Performance Tests:
- Connection to a Transceiver:
Updated! 28/7/21 - Mounting into a Die cast Enclosure:
Updated! 4/8/20! - Mounting into a Masthead
Enclosure:
Updated! 14/8/21! - Kit Changes and Updates:
Updated! 2/6/24 - Buy A EME237-70CM Kit:
- Buy A EME221-23CM Kit:
- Buy A EME221-23CM-MH Built Product:
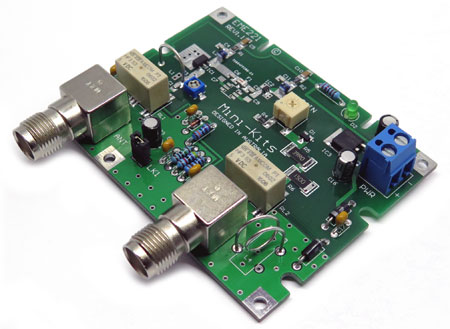
The EME221-70CM is a High performance masthead mount Receiver
Pre-amplifier that is specifically designed for the 70cm 430 to
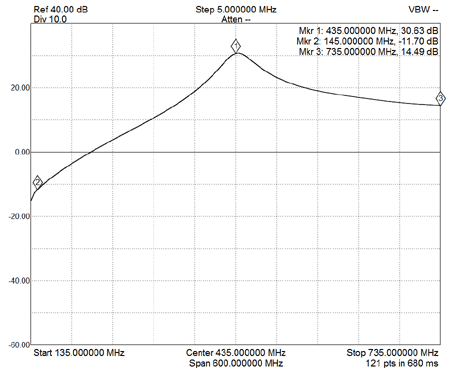
450MHz band. The Pre-amplifier has an adjustable 20 to 29dB gain,
and can be used to optimize gain distribution for coaxial cable
losses and the total gain of the receiver system. The design uses
the Mini-Circuits PGA-103 that has a very high dynamic range and
ultra low 0.38dB noise figure. The input circuit consists of a
tunable T type filter that can be tuned to optimize the noise figure
to less than 1dB while giving high rejection of signals below
200MHz. The output of the PGA-103 is filtered with a low pass filter
giving high rejection of signals above 500MHz, and is then further
amplified by a low noise Avago MGA82563 PHEMT MMIC. The design
incorporates high isolation RF changeover Relays to bypass the
pre-amplifier when not required, or when RF power from a transmitter
is applied to the antenna. An on board bias tee ( DC power injector
), allows the pre-amplifier to be antenna mounted and powered via
the coaxial cable. The Preamplifier is able to handle 50 Watts (
+47dBm ) CW, when unsequenced, or up to 100 Watts ( +50dBm ) PEP
when sequenced.
The EME221-23CM is a High performance masthead mount Receiver
Pre-amplifier that is specifically designed for the 23cm 1240 to
1300MHz band. The Pre-amplifier has an adjustable 7 to 21dB gain,
and can be used to optimize gain distribution for coaxial cable
losses and the total gain of the receiver system. The design uses
the Mini-Circuits PGA-103 that has a very high dynamic range and
ultra low 0.38dB noise figure. The input circuit is untuned
broadband to decrease losses for a noise figure under 1.5dB, (
Typically < 1.1dB ) including Relay and circuit losses. Thee
output of the PGA-103 is filtered with a 1200MHz high pass filter
giving high rejection of signals below 1000MHz, and is then further
amplified by a low noise Avago MGA82563 PHEMT MMIC. The design
incorporates high isolation RF changeover Relays to bypass the
pre-amplifier when not required, or when RF power from a transmitter
is applied to the antenna. An on board bias tee ( DC power injector
), allows the pre-amplifier to be antenna mounted and powered via
the coaxial cable. The TX bypass has a loss of around 0.8dB which
limits the maximum RF power to 25Watts ( +44dBm ) CW, when
unsequenced, or up to 50 Watts ( +47dBm ) PEP when sequenced.
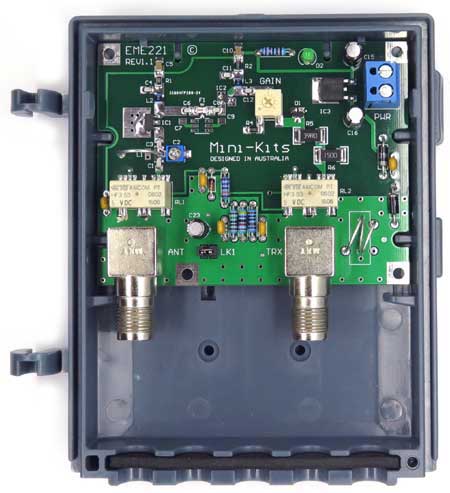
The PC board is designed to suit a low cost GME mast head enclosure which makes installation easy and provides high protection of the circuitry from weather.
1/
2/ A very small number of customers have reported HF353 Relays that
have measured open circuit in TX bypass mode. The Relays can be
easily damaged due to excessive heat when soldered, or some built
products may have been damaged by shock in the postal system. When
constructing, it is suggested that a soldering iron with a hot
setting is used so that it will quickly heat and flow solder between
each pin and the board reducing the time which could cause internal
damage.
1/
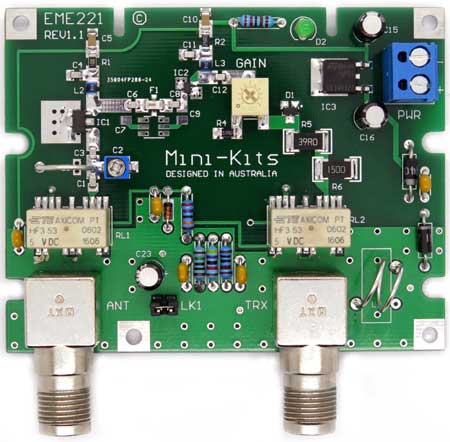
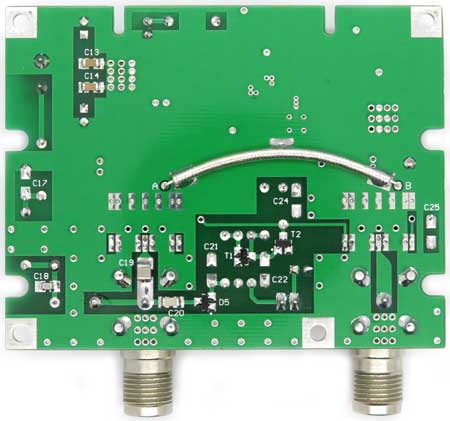
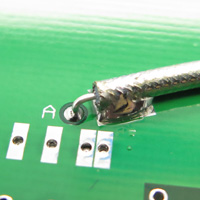
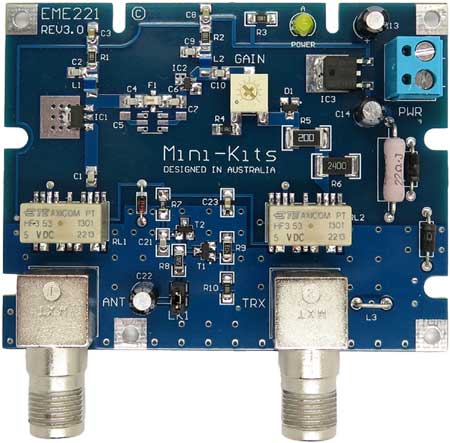
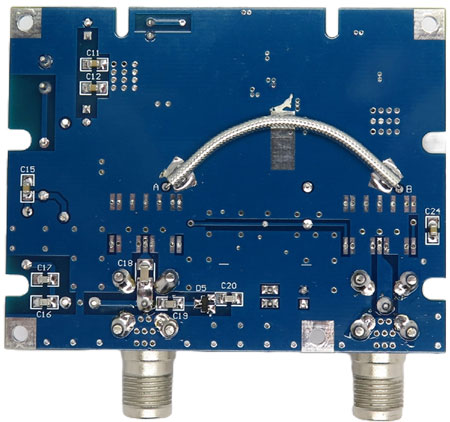
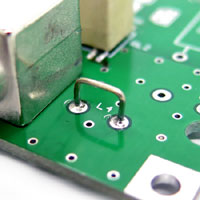
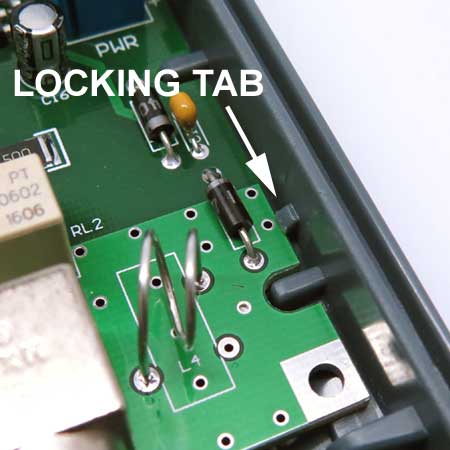
The pictures below are a final revision so should be carefully followed in construction. Be careful when fabricating and fitting L4 as it needs to be done correctly to achieve the lowest transmit power loss and high return loss. On a prototype I was not very careful when fitting the QF0.085 cable under the board between points A and B, so this created a short from the braid to one on the PCB pads which was not very obvious so check this carefully. Slight filing of the two slots at the top of the board is required to fit the GME masthead enclosure. This was unfortunate as the PCB manufacturer made a slight mistake with the board route out. The board should be fully cleaned with Isopropyl Alcohol and thoroughly dried using a hair drier before testing. Through loss tests may not be achievable if there is Isopropyl still under the connectors and relays. The performance tests below are as measured on a number of built products and were nearly all identical. BUY THIS PRODUCT
The pictures below are a final revision so should be carefully followed in construction. Be careful when fabricating and fitting L4 as it needs to be done correctly to achieve the lowest transmit power loss and high return loss. On a prototype I was not very careful when fitting the QF0.085 cable under the board between points A and B, so this created a short from the braid to one on the PCB pads which was not very obvious so check this carefully. Slight filing of the two slots at the top of the board is required to fit the GME masthead enclosure. This was unfortunate as the PCB manufacturer made a slight mistake with the board route out. The board should be fully cleaned with Isopropyl Alcohol and thoroughly dried using a hair drier before testing. Through loss tests may not be achievable if there is Isopropyl still under the connectors and relays. The performance tests below are as measured on a number of built products and were nearly all identical. BUY THIS PRODUCT
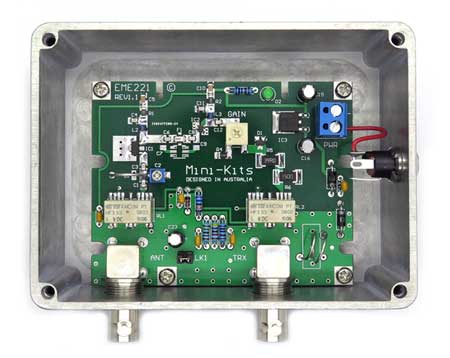
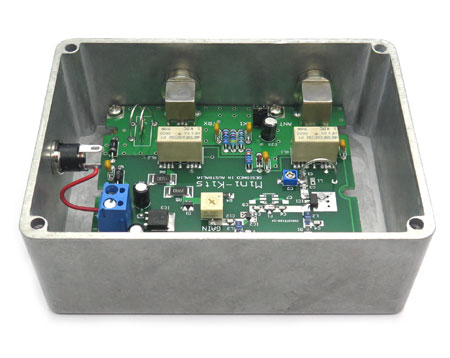
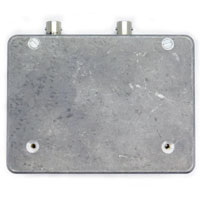
The Hammond 1590S or 1590SFL die cast enclosure is ideal for mounting the preamplifier module for in shack use. The enclosure allows either the TNC or BNC type R/Angle PC board mount connectors to be easily used for minimum loss. The board sits on M3 x 8mm high brass spacers mounted to the enclosure with M3 x 6mm countersunk screws.
This is for advanced constructors that have experience and access to a workshop with metal working tools. The basic tool requirements are a drill press, Vice, M1.5, M3, M6, M12, and 1.4 inch drill bits, scriber, metal punch, and a hammer.
-
Place an unpopulated EME221 PC board into the enclosure and mark the four mounting holes using a fine felt tip pen. Using a punch and hammed mark the centre of the mounting holes for drilling. Drill out the four holes starting with a 1.5mm drill bit followed by a 3mm bit. Counter sink the holes on the bottom of the enclosure to suit M3 x 6mm countersunk screws.
-
Mount the PC board into the enclosure on M3x8mm brass spacers using 4x M3x6 countersunk screws and 4x M3x6 Phillips head screws. Mark the positions for the BNC connectors using a felt tip pen, and then remove the PC board.
-
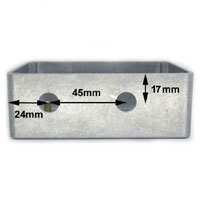
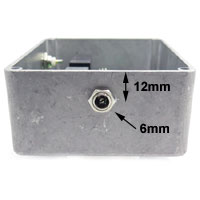
Mark and drill two 12.5mm holes in the die cast enclosure as shown in the picture above to suit the BNC connectors, and a 8mm hole to suit the 2.1mm DC connector.
-
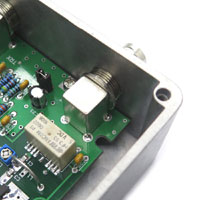
Mount the completed PC board pre-amplifier module into the enclosure and fit the BNC connectors to the enclosure. The board when fitted to the enclosure should have a tight fit around the BNC connectors not requiring any fastening of the connectors to the enclosure.
-
Mount the 2.1mm DC connector to the enclosure rotating it to the position as shown in the pictures. Carefully fully tighten the nut using a small spanner or wrench.
-
Connect the 2.1mm DC connector to the +ve connection on the terminal connector for the power using a small length of insulated hookup wire.
-
Finally tune the pre-amplifier as per the Kit construction notes for the best noise figure.
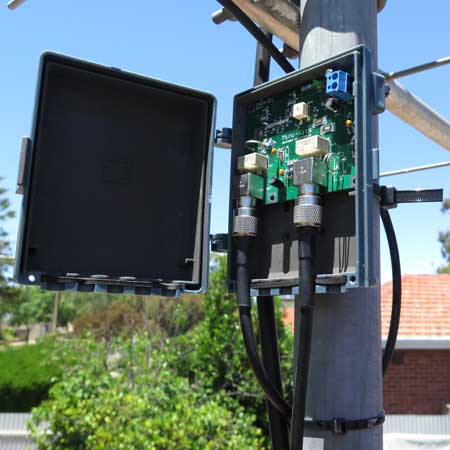
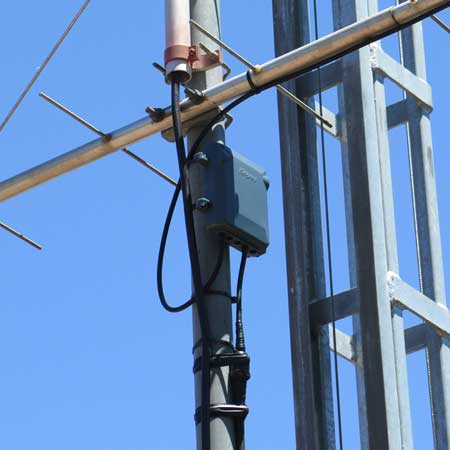
The GME Masthead enclosure will accept coaxial cables up to around 8mm in diameter. Therefore larger cables like CNT®-400 and RG8/213 cannot be used. Larger cables would also place too much strain on the TNC sockets on the pre-amplifier board. Some customers have tried to use TNC male to N type female adapters to connect to the main feedlines, but the extra length will not fit inside the enclosure. To connect the Antenna feed line to the pre-amplifier, and pre-amplifier output to the main feed line, we recommend the use of CNT®240 ( 240 Type ) cable with crimped TNC connectors. CNT®240 is double shielded and has losses similar to RG213 cable, but has a much smaller 6.5mm diameter. Use the website search box and search for ( 240 type ) to see all the available cable and connectors.
1/ Mini-Kits cannot be expected to take responsibility to make this product work on your Transceiver, we can only give guidance on how best to use this product. Using this product with high power FM or SSB modes does have the risk of damaging the Pre-amplifier if the transceiver switches from RX to TX modes faster than the pre-amplifiers relays. Some protection is built into the pre-amplifier circuit including a RF sensing circuit and Limiter diode protection, but high RF levels into the pre-amplifier before it has fully switched from RX to TX mode can damage the pre amp. Some Transceivers are prone to producing a spike on the RF output when going into transmit mode. This can be due to the ALC in the Radio not acting fast enough. This is where a sequencer circuit is useful to sequence the switching of RF amplifiers and pre-amplifiers so that the relays etc have enough time to switch RX to TX mode before RF power is applied. The Relay isolation that has been tested on the EME237-70CM Kit should easily allow up to 100Watts PEP( +50dBm ) of RF to be used.
2/ Transceivers including the ICOM IC-475, IC-1275, IC-820/821, IC-910, IC-9100, and IC-9700, have a pre amp switch with delay sequencing built in, so they are all able to directly power a pre-amplifier through the antennas coaxial cable connection so require no external bias tee.
3. For other Transceivers including the TS2000, TS2000X and IC706 series without inbuilt preamplifier switching and bias tee, the preamplifier can be powered either by running a DC power cable directly to the pre-amp board, or by feeding it up the coaxial cable. For FM operation, the onboard RF sensing circuitry can be simply used, but for SSB it is much better to use an external bias tee to power through the coaxial cable. Many Transceivers have access to a +12 volt TX connection on the accessories socket on the rear. This can be used to control the bias tee switching the +12vdc to the pre amp in RX mode, and disconnecting it in TX mode. At this time the RF sensing circuit should still be used on the pre-amp as a fail safe, as there is no delay sequencing built into the bias tee.
1/ August 2020, the EME221-70CM product has been retired and replaced with the EME237-70CM.
2/ With Kits after November 2019, the MGA82563 has been replaced with a PSA-0012, and R2 has been changed from a 24 to 10R to suit.
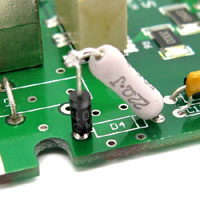
3/ The power supply circuit has been modified to reduce the dissipation from the +5v 78M05 Regulator. A 22 ohm 2 Watt MOS resistor is now fitted in series with Diode D4 to reduce the voltage to the input of the regulator. If you are powering the preamp to the PWR connector, then it is suggested to fit the resistor in series with D3 instead of D4. Please see the construction picture for how the components are mounted.
4/
5/ There have been reports of failure of the PGA-103 due to lightning damage. It is suggested that the preamplifier power is turned off when there are storms to prevent any damage.
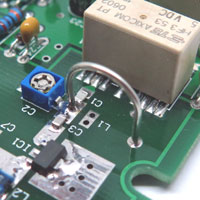
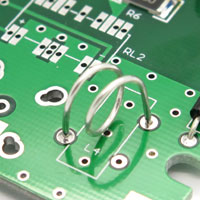
6/ The wire hoop L1 should be 10.5mm from the PCB to the very top of the wire loop not 10mm as shown on some early circuit diagrams.
7/ Instability type noise that randomly lifts the S meter when in SSB mode was traced to a damaged PGA-103. It was suspected that it may have been damaged by excessive heat when soldering.
8/ No transmit RF through the preamp can be due to one of the relays connections not being fully soldered. Refer again to the Kits notes on the importance of fully soldering the relays connections. Also refer to 3/ above.
1/ With Kits after November 2019, the MGA82563 has been replaced with a PSA-0012, and R2 has been changed from a 24 to 10R to suit.
2/ The power supply circuit has been modified to reduce the dissipation from the +5v 78M05 Regulator. A 22 ohm 2 Watt MOS resistor is now fitted in series with Diode D4 to reduce the voltage to the input of the regulator. If you are powering the preamp to the PWR connector, then it is suggested to fit the resistor in series with D3 instead of D4. Please see the construction picture for how the components are mounted.
3/
4/ Higher than expected losses through the pre-amplifier in TX mode can be due to circuit losses caused by the 0.3pF capacitor C20, or the incorrect fabrication of L4. In some cases replacing this capacitor has fixed the problem but it could also be flux under the capacitor that may have caused the extra loss.
5/ Issues with receive gain or not producing the correct frequency response can sometimes be traced to the Mini-Circuits LFCN-1200 filter. Check that you have soldered all connections to the board including the earth connections on the sides of the filter. There have been issues with these filters at times being faulty, or being damaged when soldering to the board.

