EME220 Series Preamplifier Kits
- EME220 Description:
Updated! June 22 - EME220-2M Application
Block
- EME220-6M Application
Block
- Kit Constructors Alert:
- EME220-1.25M Kit Notes:
- EME220-2M Kit Notes:
- EME220-6M Kit Notes:
Updated! Nov 23 - Mounting into a Die cast Enclosure:
- Mounting into a Masthead Enclosure:
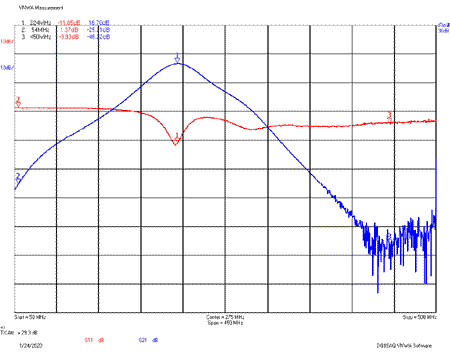
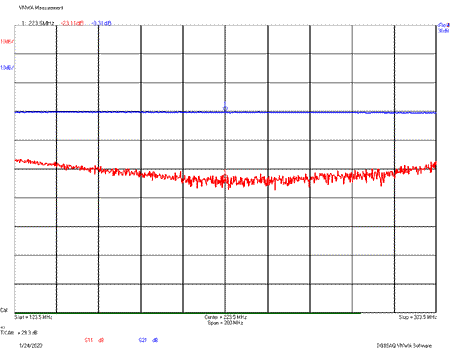
- EME220-1.25M Kit Performance Tests:
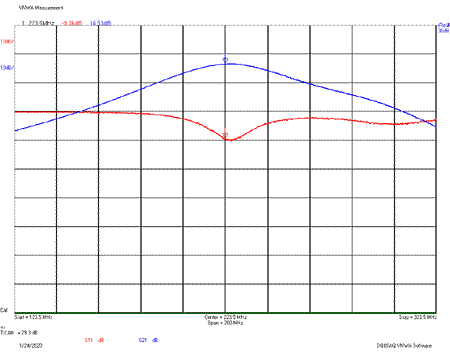
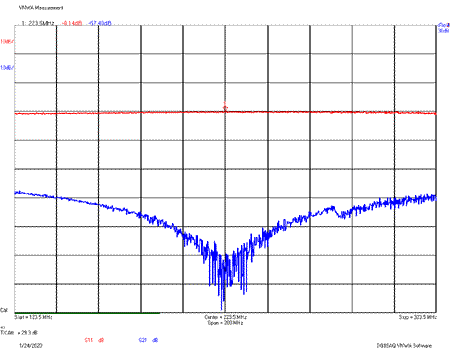
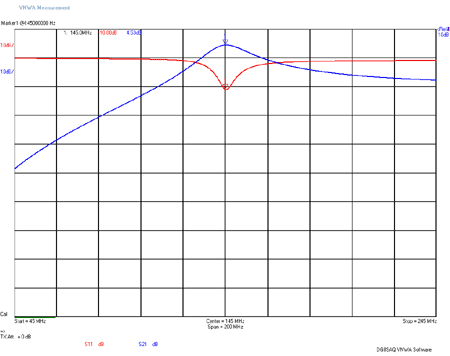
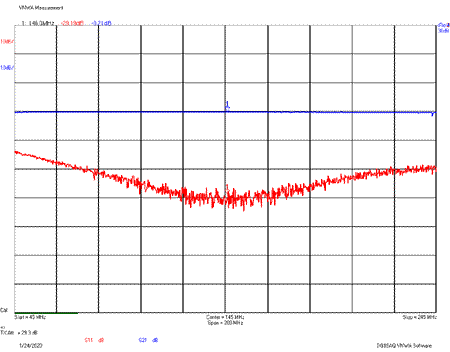
New! - EME220-2M Kit Performance Tests:
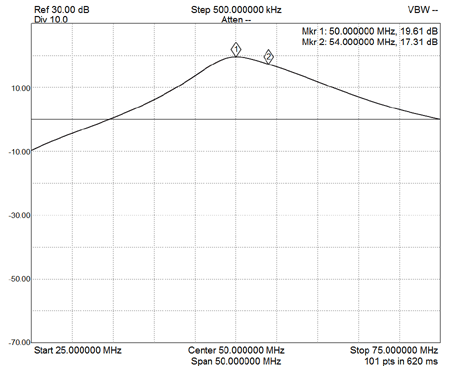
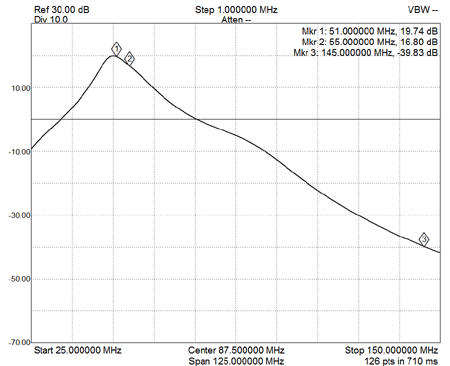
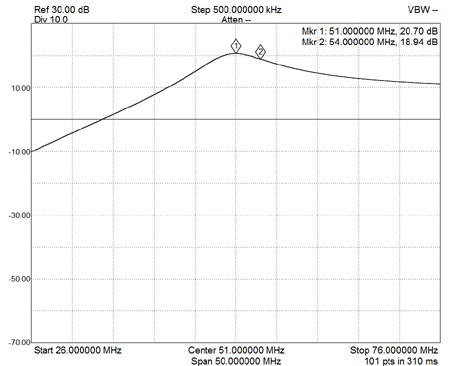
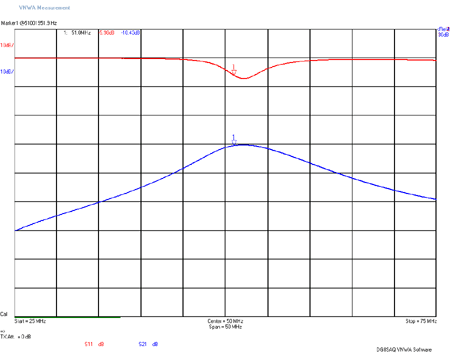
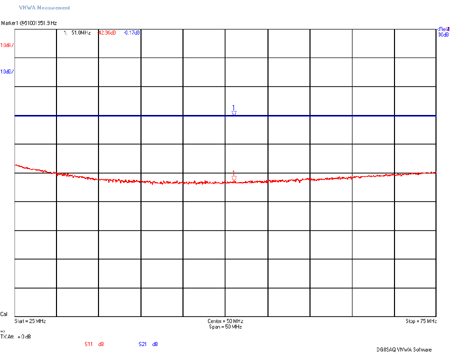
- EME220-6M Kit Performance Tests:
- Connection to a Transceiver:
Updated! Feb 25
- Kit changes and Updates:
Updated! Jan25
- Known Construction Faults:
Updated! Oct 22 - Buy A EME220 Series Kit:
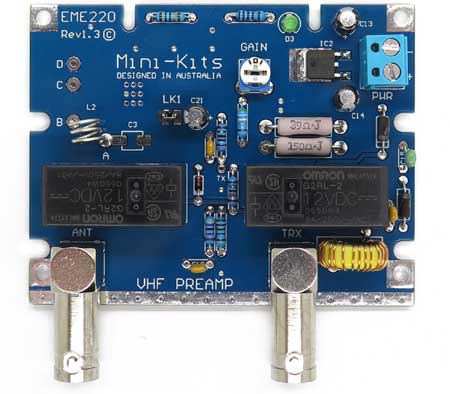
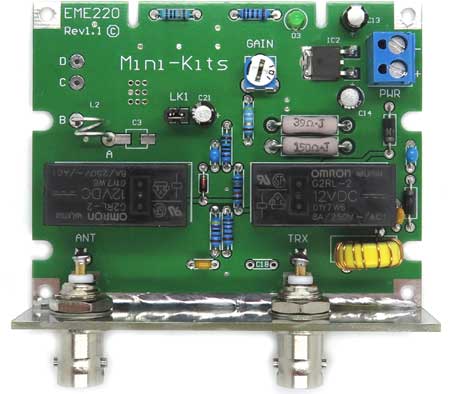
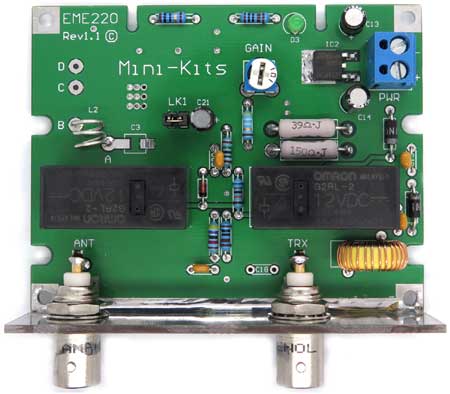
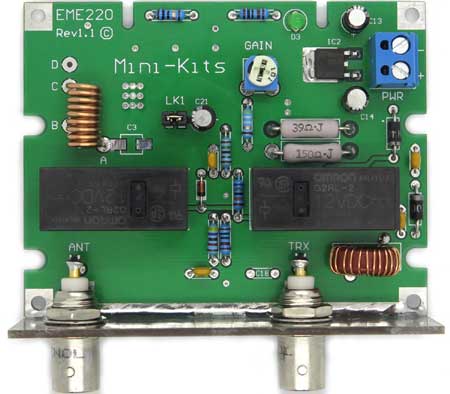
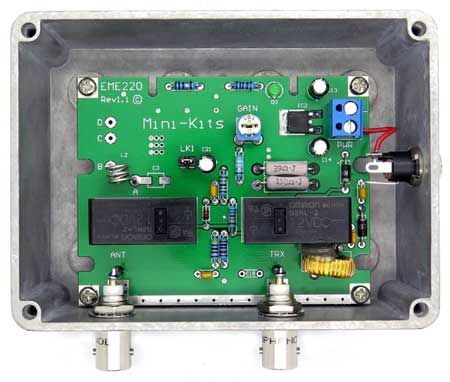
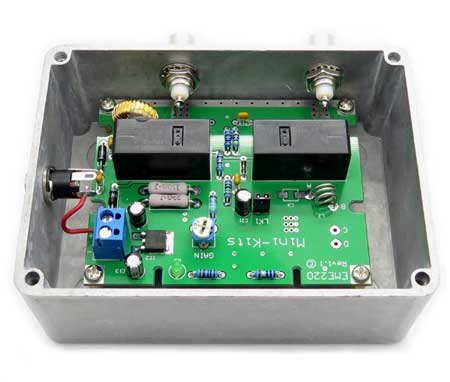
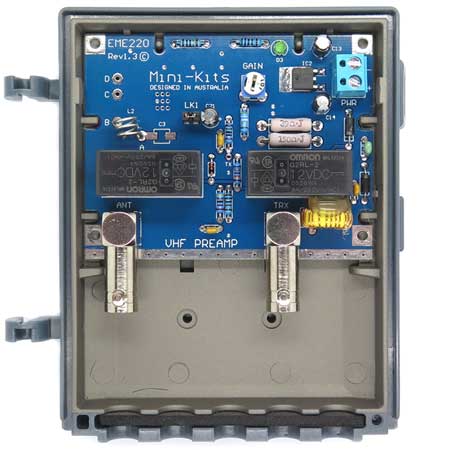
The EME220 series VHF Pre-Amplifier Kits are a redesign of the popular EME157 Kits that were sold for over 8 years, and include 1.25M ( 222-225MHz ), 2M ( 144-148MHz ), and 6M ( 50-54MHz ) band versions. The design uses the Mini-Circuits PGA-103 High IP3 Amplifier which provides a lower noise figure and better strong signal handling compared to the previous BF998 MesFET design. The design uses a tuned input T type band pass filter and a low pass output filter to help reduce out of band signal from overloading the receiver. Tests done by W6PQL to improve the RF isolation of the Relays due to stray capacitance has been incorporated to protect the Pre-amplifier from damage when used with high power RF Amplifiers. The output of the Pre-amplifier also incorporates an adjustable 6 to 16dB variable attenuator to optimize the gain distribution for coaxial cable losses and receiver gain, and a RF limiter Diode further protects the Pre-amplifier output from Damage. The amplifier can be fed directly with DC power, or it can be powered via the coaxial cable when masthead mounted. The PC board is designed to suit a low cost GME mast head enclosure which provides high protection of the circuitry from weather.
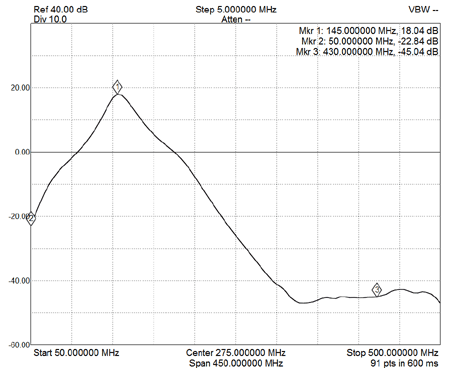
The Pre-amplifier has been designed to be easy to construct, and can be centre frequency tuned for use between 210 and 230MHz, and is suitable for the 222-225MHz Amateur Band. A Mini-Circuits PGA-103 has been used as it has a low 0.35dB NF at 220MHz along with high IP3 for strong signal cross modulation performance, and with the input relay and tuned T type filter losses has a better than 0.7dB NF. The relay isolation should allow RF power levels of up to 57dBm or 500 watts to be used if the Pre-amplifier is sequenced. The onboard filters consist of the tuned input T type filter and an output low pass filter that provides up to 40dB rejection at 50MHz, 18dB at 144MHz, and 60dB at 430MHz, which protects the receiver from strong out of band signals. BUY THIS PRODUCT
The Pre-amplifier has been designed to be easy to construct, and can be centre frequency tuned for use between 135 and 160MHz, and is suitable for the 144-148MHz Amateur Band. A Mini-Circuits PGA-103 has been used as it has a low 0.36dB NF at 145MHz along with high IP3 for strong signal cross modulation performance, and with the input relay and tuned T type filter losses has a better than 0.7dB NF. The relay isolation should allow RF power levels of up to 57dBm or 500 watts to be used if the Pre-amplifier is sequenced. The onboard filters consist of the tuned input T type filter and an output low pass filter that provides up to 40dB rejection at 50MHz and 60dB at 430MHz, which protects the receiver from strong out of band signals. BUY THIS PRODUCT
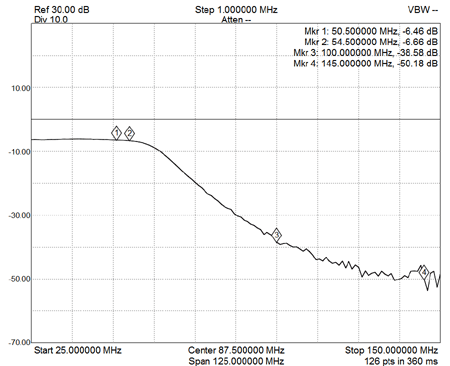
The Pre-amplifier has been designed to be easy to construct, and can be centre frequency tuned for use between 50 and 54MHz. A Mini-Circuits PGA-103 has been used as it has a low 0.36dB NF at 50MHz along with high IP3 for strong signal cross modulation performance, and with the input relay and tuned T type filter losses has a better than 0.7dB NF. The relay isolation should allow RF power levels of up to 57dBm or 500 watts to be used if the Pre-amplifier is sequenced. The onboard filters consist of the tuned input T type filter and an output low pass filter that provides up to 30dB rejection at 30MHz and greater than 57dB at 145MHz, which protects the receiver from strong out of band signals.
Due to the high noise floor on the 6m band, a Pre-amplifier may make little or no difference when used on modern Transceivers that have the 6m band. Many modern Transceivers already have a second Pre-amplifier that can be switched on, and have a noise figure well under the typical noise floor measured on the band. Unless you are in a low noise rural location, have the Pre-ampllifier mounted at the Antenna to overcome coaxial cable losses, then it is doubtful that you would achieve any receive performance increase that would be worth the effort. BUY THIS PRODUCT
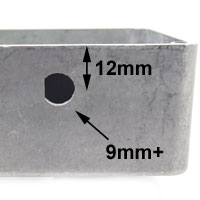
The Hammond 1590S or 1590SFL die cast enclosure is ideal for mounting the Pre-amplifier module for in shack use. The enclosure allows various connector types including BNC, N and UHF types to be easily used. The board sits on M3 x 12mm high brass spacers mounted to the enclosure with M3 x 6mm countersunk screws.
This is for advanced constructors that have experience and access to a workshop with metal working tools. The basic tool requirements are a drill press, Vice, M1.5, M3, M6, M9, and 1.4 inch drill bits, scriber, metal punch, and a hammer.
-
Place an unpopulated EME220 PC board into the enclosure and mark the four mounting holes using a fine felt tip pen. Using a punch and hammed mark the centre of the mounting holes for drilling. Drill out the four holes starting with a 1.5mm drill bit followed by a 3mm bit. Counter sink the holes on the bottom of the enclosure to suit M3 x 6mm countersunk screws.
-
Mount the PC board into the enclosure on M3x12mm brass spacers using 4x M3x6 countersunk screws and 4x M3x6 phillips head screws. Mark the positions for the BNC connectors using a felt tip pen, and then remove the PC board.
-
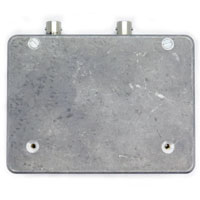
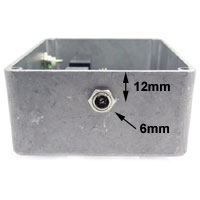
Mark and drill two 9mm holes in the die cast enclosure as shown in the picture above to suit the BNC connectors, and a 8mm hole to suit the 2.1mm DC connector.
-
File out the two holes for the BNC connectors as shown in the picture to suit the flat of the connectors making sure to carefully do this so that the connectors are a tight fit. The actual hole size is around 9.25mm so some filing of the 9mm hole is also required.
If you over file the holes then this can cause problems later on with the connectors rotating in the holes when doing up the nuts. -
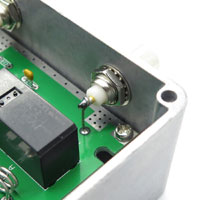
Mount the completed PC board Pre-amplifier module into the enclosure and fit the BNC connectors to the enclosure. Make sure to fully tighten the nuts so that they cannot come loose with use.
-
Fill the two ANT and TRX connection holes on the board with solder, then tin sole 0.7mm tinned copper wire and connect these connections to the BNC connectors. No earthing of the board to the connectors was found to be required as the return loss remained at better than 20dB.
-
Mount the 2.1mm DC connector to the enclosure rotating it to the position as shown in the pictures. Carefully fully tightened the nut using a small spanner or wrench.
-
Connect the 2.1mm DC connector to the +ve connection on the terminal connector for the power using a small length of insulated hookup wire.
-
Finally tune the Pre-amplifier as per the Kit construction notes for the best noise figure.
The GME Masthead enclosure will accept cables up to around 8mm in diameter. Therefore larger cables like RG8/213 cannot be used. Larger cables would also place too much strain on the BNC sockets on the Pre-amplifier board. To connect the Antenna feed line to the Pre-amplifier, and Pre-amplifier output to the main feed line, we recommend the use of CNT®240 ( 240 Type ) cable with crimped BNC connectors. CNT®240 is double shielded and has losses similar to RG213 cable, but has a much smaller 6mm diameter. Use the website search box and search for 240 series cable and connectors.
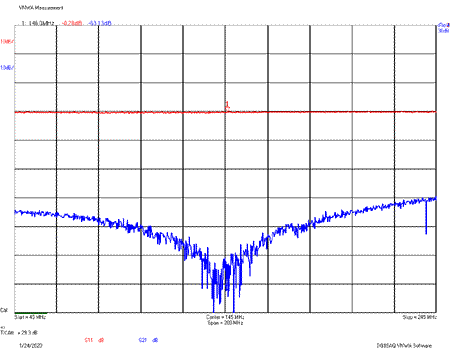
1/ Mini-Kits cannot be expected to take responsibility to make this product work on your Transceiver, we can only give guidance on how best to use this product. Using this product with high power FM or SSB modes does have the risk of damaging the Pre-amplifier if the transceiver switches from RX to TX modes faster than the Pre-amplifiers relays. Some protection is built into the Pre-amplifier circuit including a RF sensing circuit and Limiter diode protection, but high RF levels into the Pre-amplifier before it has fully switched from RX to TX mode can damage the pre amp. Some Transceivers are prone to producing a spike on the RF output when going into transmit mode. This can be due to the ALC in the Radio not acting fast enough. This is where a sequencer circuit is useful to sequence the switching of RF amplifiers and Pre-amplifiers so that the relays etc have enough time to switch RX to TX mode before RF power is applied. The high Relay isolation that has been tested on the EME220-2M Kit should easily allow up to 500 Watts PEP ( +57dBm ) of RF to be used as long as the Pre-amplifier is sequenced.
2/ Powering the Pre-amplifier with +10 to 15vdc can be either by
running a DC power cable direct to the pre-amp board, or by feeding
it up the coaxial cable. Transceivers like the ICOM IC275, IC475,
IC820/821, IC910, IC9100, and IC9700 have a Pre-amp switch with
delay sequencing for the 2m and above bands, and are able to
directly power a Pre-amp through the coaxial cable and require no
additional circuitry.
3/ Transceivers with a open collector TX output on the rear panel, i.e. IC-7300 pin 3, TS2000 pin 6 of the 13pin DIN connector, can be directly connected to the junction on R6 and R9 on the PC board. This will allow direct switching of the Pre-amplifier when going to TX mode. Doing it this way does not require a bias tee to feed power up the coaxial cable, but you will have to run a twin shielded cable to the Pre-amplifier to power and switch the Pre-amp.
3/ The Mini-Kits Bias Tee or DC Power Injector allows the
Pre-amplifier power to be easily switched via the coaxial cable.
Many Transceivers have access to a +12 volt TX connection on the
accessories socket on the rear. This can be used to control the bias
tee switching the +12vdc to the Pre-amp in RX mode, and
disconnecting it in TX mode.
1/ PC Board updated to Rev1.3 February 2022. This board now suits right angle BNC connectors. There are no other changes to the design.
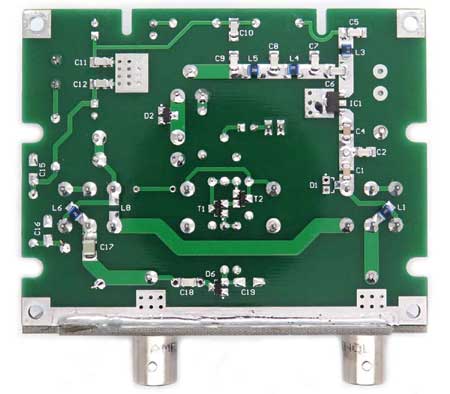
2/ Low gain can be due to a number of problems. First check that you have fully soldered the components to the board, especially the SMD inductors that can be difficult to fully flow solder underneath. Check the voltages on the PGA-103, they should be around 0.7v on the input and 4.2v on the output. If the output voltage is around 5v or much less than 4v the PGA-103 is faulty.
3/ High loss through Transmit bypass on VNA. Found a new Omron G2RL relay to have an open circuit contact.
1/ Amplifier not working , checked PGA-103 voltages, 0v on input and +5v on output, no current drawn. Fault found was the device had not been mounted correctly onto the pads on the PCB shorting the input lead to ground.
2/ No Amplifier gain was found to be one of the SMD inductors L3, L4, or L5 not soldered to the board.
3/ Blown PGA-103 on a 2m Pre-amp was found to be L6 1uH not being soldered correctly to the board causing poor relay isolation when RF was applied.
4/ Most issues have found to be rushed construction with poor soldering.

